Thread Pendant Lamp / Chandelier
Why buy a fancy chandelier when you can make it in less than few hundred rupees?
Here we go with the steps to create a thread pendant lamp. Will guide you through the step by step process of doing the same.

Things required
Raw Materials
Thread/Twin Tickness No. 10 or bigger : Two roll
Fevicol : 400 gm
Water
Sellotape
Wide mouth plastic bottle (I use a waste Curd box)
Inflatable Kids plastic ball (Select the size, because this will be the size of your lamp)
0 watt bulb and wire set
Wide open vessel/container for mixing fevicol (I use a waste sweet box)
Glove (Optional) if you want not to touch the glue with your hand.
Step 1:
Blow the inflatable plastic ball to fullsize.
Step 2:
Tie a long thread to the blowing nozzle, so that it can be hanged on some place of your convenience to work on. Make sure you select a corner place so that you can leave it hanging in the same place for more than 2 days.

Step 3:
On the other end of the ball stick the wide mouth plastic can (I use a waste Curd box) using sellotape. Refer to the image under step 8. This will be the bottom opening for the chandlier. So if you want a small / wide opening, then you can select the plastic bottle with respective mouth size.
Step 4:
Apply a spoon of oil(any) on the ball and spread it uniformly all through the ball. This is done to avoid fevicol/glue getting stick to the ball.
Step 5:
Hang the ball using the long thread (from step 2) to a hook. Select a place where you can leave it suspended for close to two days. Spread a plastic cover below the ball in the floor to collect the dripped glue to avoid the floor getting stained.
Step 6 :
In a wide vessel/container add half the volume of a fevicol and mix 5 times its volume of water and stir well. Mix it well untill there is no lumps in the fevicol Water mix.
Step 7:
Place one end of the thread in the vessel and keep adding the thread in circular motion to the vessel. Make it slowly and make sure you are not messing up with it. If the threads get zigzag there are chances of them getting messed up. Periodically immerse them into the fevicol and keep adding them in circular motion. Once the entire thread ball is immersed in the fevicol-water mix we can proceed with the next step. Hold the last end of the thread, we are going to start with this in the next step.
Note : By any reason if you feel the fevicol-water is not sufficient for the thread ball, mix fevicol and water is some other container and add it to the vessel where we are having out thread immersed.
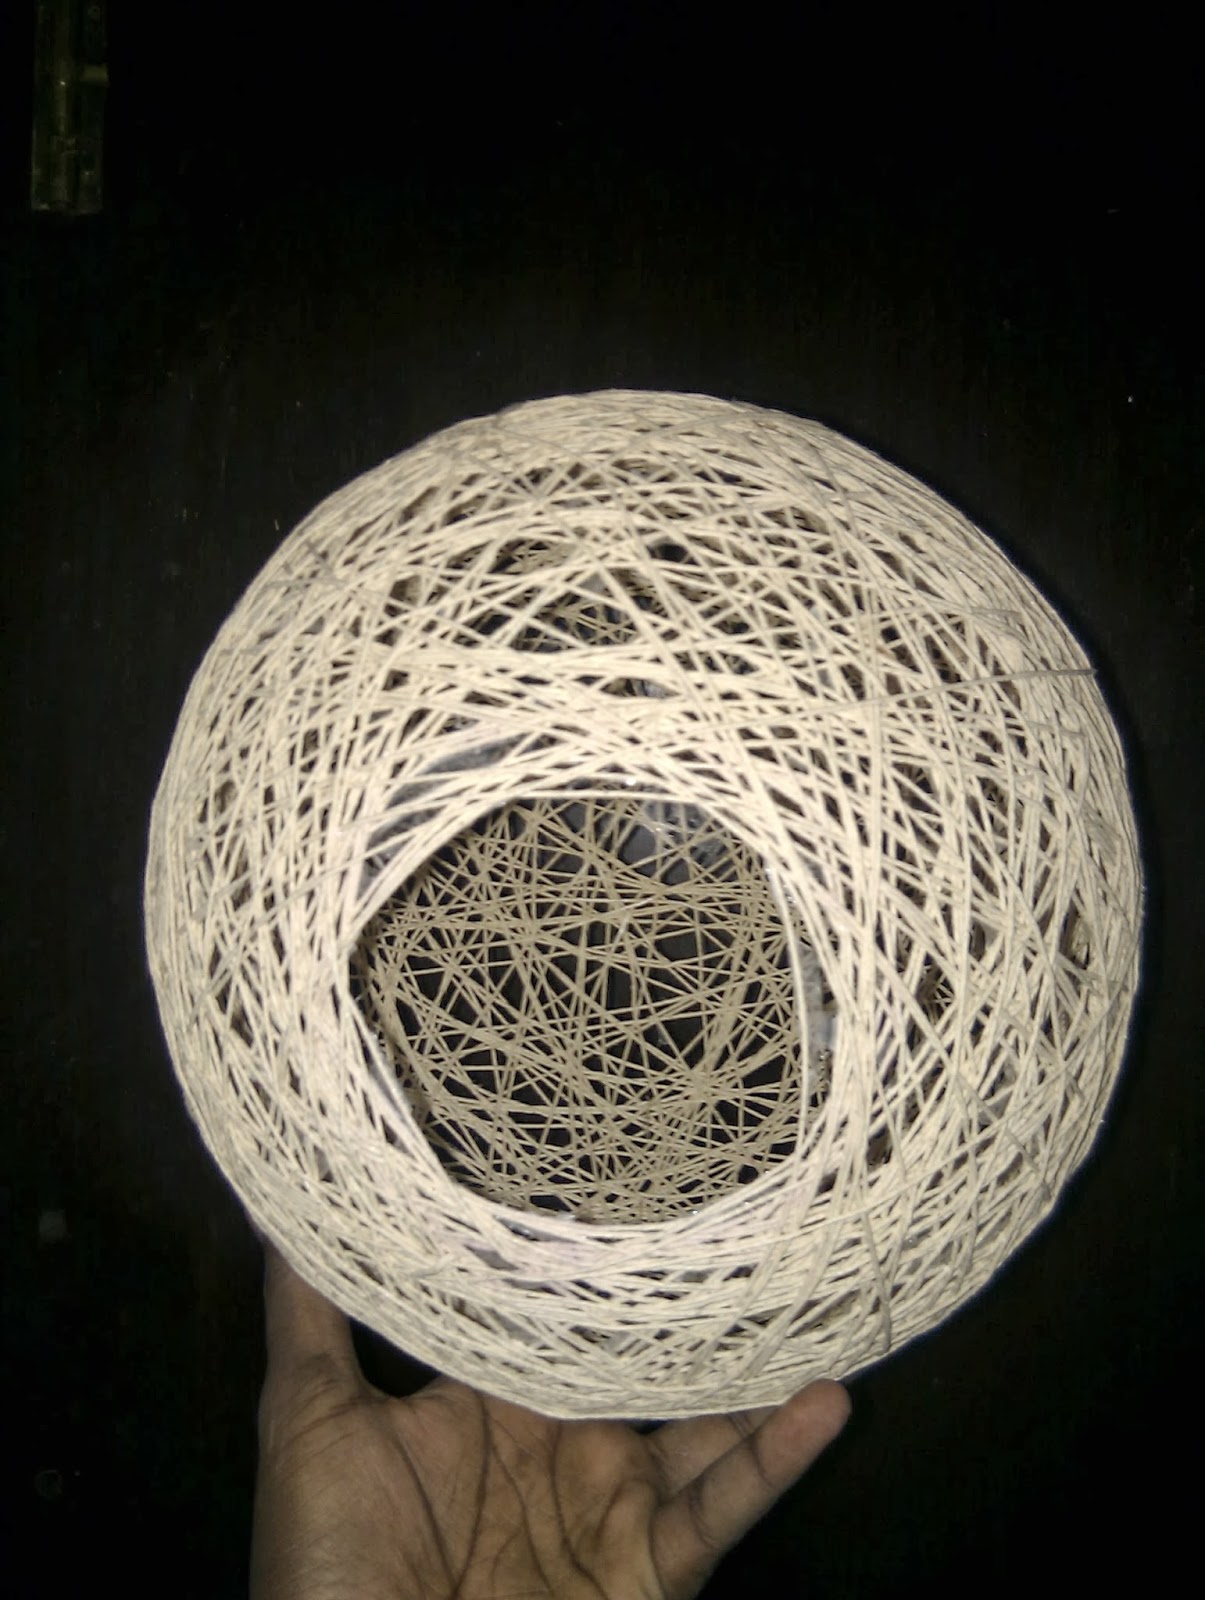
Step 8:
Start wrapping the thread on the ball, doing it slowly so that the thread in the fevicol-water mix is coming in a uniform flow. Wrap it randomly and fill any gaps in the ball. The thread will not be present in the place where we have sello phone tapped the plastic bottle, so that creating a opening for the lamp. The final outcome will look like below.
Note : If the thread is not sufficient repeat the Step 6, 7 and 8.

Step 9 :
Excess Fevicol-water will drip off the ball, need not worry about that. Let the ball with the threads dry over night. Apply concentrate fevicol to your hand and stick that on the thread on the ball randomly by next day morning when it is almost dry. Add excess fevicol on the rim where it meets the plastic bottle and the ball.
Do it gently so that you are not squeezing the ball. Repeat the step 9 twice / thrice after 8 hours interval each. Then leave it to dry for 24 hours. If the ball is completly dry we can proceed with the next step. If not leave it for few more hours/days to dry completely.
Step 10 :
By now the thread on the ball will be hard enough to stand stiff without the support of the ball. Cut the thread hanging the ball and open the air nozzle and release the air out of the ball. If required suck the air out of the ball gently. During the process use a small stick and poke the ball to get release from the thread and let it free.
Step 11:
Cut the curd box at the bottom and remove the squeezed ball and curd box out. Hurray we are done with the lamp.
Step 12:
Final step insert the wire-bulb assembly from the bottom hole(Curd box) through the top small hole (air nozzle) and hang it. Put a knot in the wire and make sure the bulb hangs in the middle of the thread lamp. For safety use a Zero watt bulb so that we are not gonna burn the thread lamp with excess heat from the bulb. Hang it in your desired place using the wire itself and plug it.


Awesome thread pendant lamp / chandelier is ready to decorate your living room/bed room.
Do let us know if you need any help/clarifications.
Follow my blog for more craft works DIY.
Do visit my facebook page to view my craft works.
Akshaya Craaft
Comments and critiques welcome.
Easy steps to follow ....... wonderful outcome, will try this ;)
ReplyDeleteபெருமைப் படுகிறேன், எங்கள் மகன் Saravanan Rathnavel எழுதிய பதிவை பகிர்வதில்.
ReplyDeleteWhy buy a fancy chandelier when you can make it in less than few hundred rupees?
நண்பர்கள் இந்த பதிவை படிக்க வேண்டுகிறேன். எனது பக்கத்தில் பகிர்கிறேன்.